
Home : Week 6 : Customize the HTML
Once you have created your portfolio images, thumbnails, and full sized images, and created your site graphics (the splash graphic, and the header graphic) you will need to customize the HTML templates with your images, and text descriptions of your work.
Launch Photoshop. Click on the Foreground color on the tool pallette.
You should see the Color Picker open.
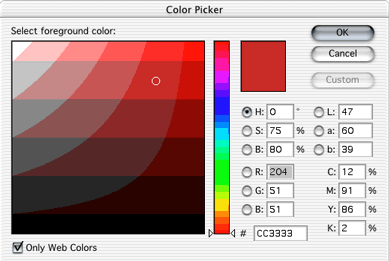
Check "Only Web Colors" if you want to be sure that the colors on your web site are consistent on the widest range of computers.
Pick a color by using the slider, and clicking in the "Select Foreground Color" box. The HTML code for the color should appear by the "#" near the bottom of the color picker window. Write down that code for use in your HTML. Remember you must have a "#" before any color code in HTML.
There are 8 HTML files you will need to edit.
You will have to edit the same parts of each page.
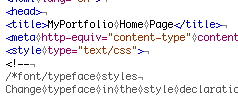
Find the Title tags on each page, and enter a custom title for each. Remember, the title appears on the title bar of the browser window.
Remember, you must edit the styles on all 8 HTML templates.
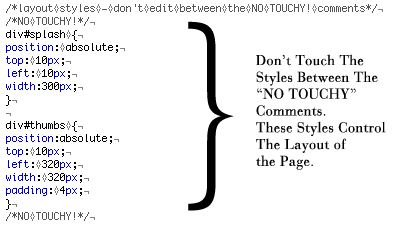
Do not edit any styles between the "NO TOUCHY" comments. These styles control the layout of the page. If you bread these styles, you will break the page layout.
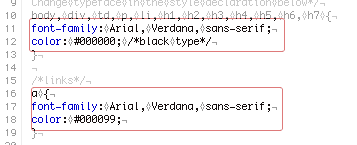
Find the typefaces selections in the styles and enter your own typeface choices.
Notice that the "a" tag has a separate font declaration. You may want to have your links be a different color or typeface than the rest of the document.
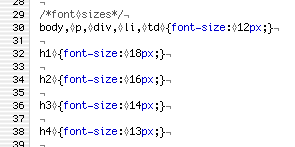
Enter the font sizes you would like to use.
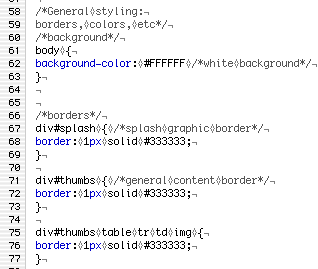
If you want to make the background color of your page something other than white, change "#FFFFFF" next to "background-color:" to another color.
If you want to change the borders for a particular part of the page, you can enter a new width ("3px" instead of "1px"), a different style ("dotted" instead of "solid"), or a different color("#0000FF" instead of "#333333"). If you want to remove the border completely, delete the width, style, and color information after the word "border" and replace with the word "none."
Remember that your thumbnails are serving as links to your portfolio pages. Make sure your thumbnails appear in the same order on every page. This way your links will be consistent on every page.
It might be easier for you to make a list of your images in the order you want them to appear in your portfolio. Then you can easily remember which thumbnail comes first, second, third, and so on.
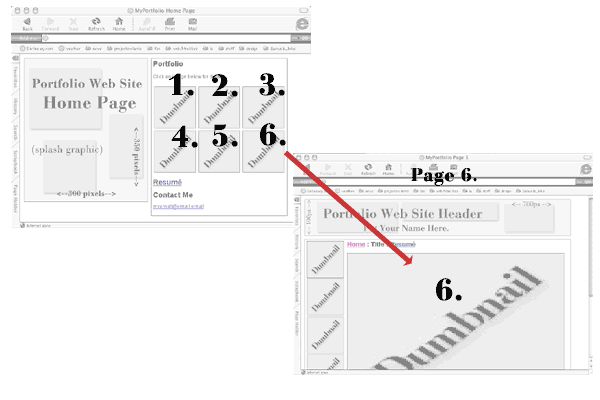
In the HTML, you will see comment tags near each thumbnail image tag.

If you see <!--Thumbnail 2--> in the code, you know that this will be the second thumbnail on the page, and that it will link to "page2.html."
Inside the image tag, you will see 'src="images/dumbnail.jpg" width="100" height="100"'. Replace "dumbnail.jpg" with your thumbnail image file's name.
![]()
Inside the image tag, you will see 'src="images/dumbnail_f.jpg" width="600" height="400"'. Replace "dumbnail_f.jpg" with your image file's name. Replace the width and height with your image's width and height in pixels.
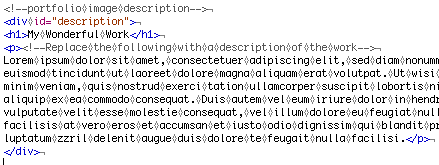
Delete the "lorem ipsum" text with a brief one to two paragraph description of the work appearing on that page.
Replace "My Wonderful Work" with a title or short description of the work.